A fresh install does nothing to your storefront until you set it up. The Home tab carries a Getting started checklist with five steps:
- Set the ages your gate asks for
- Choose how your gate appears
- Customize your age gate
- Publish your age gate
- Enable app embed in theme
Both gate designs are added for you at install, so there is nothing to pick before you start.
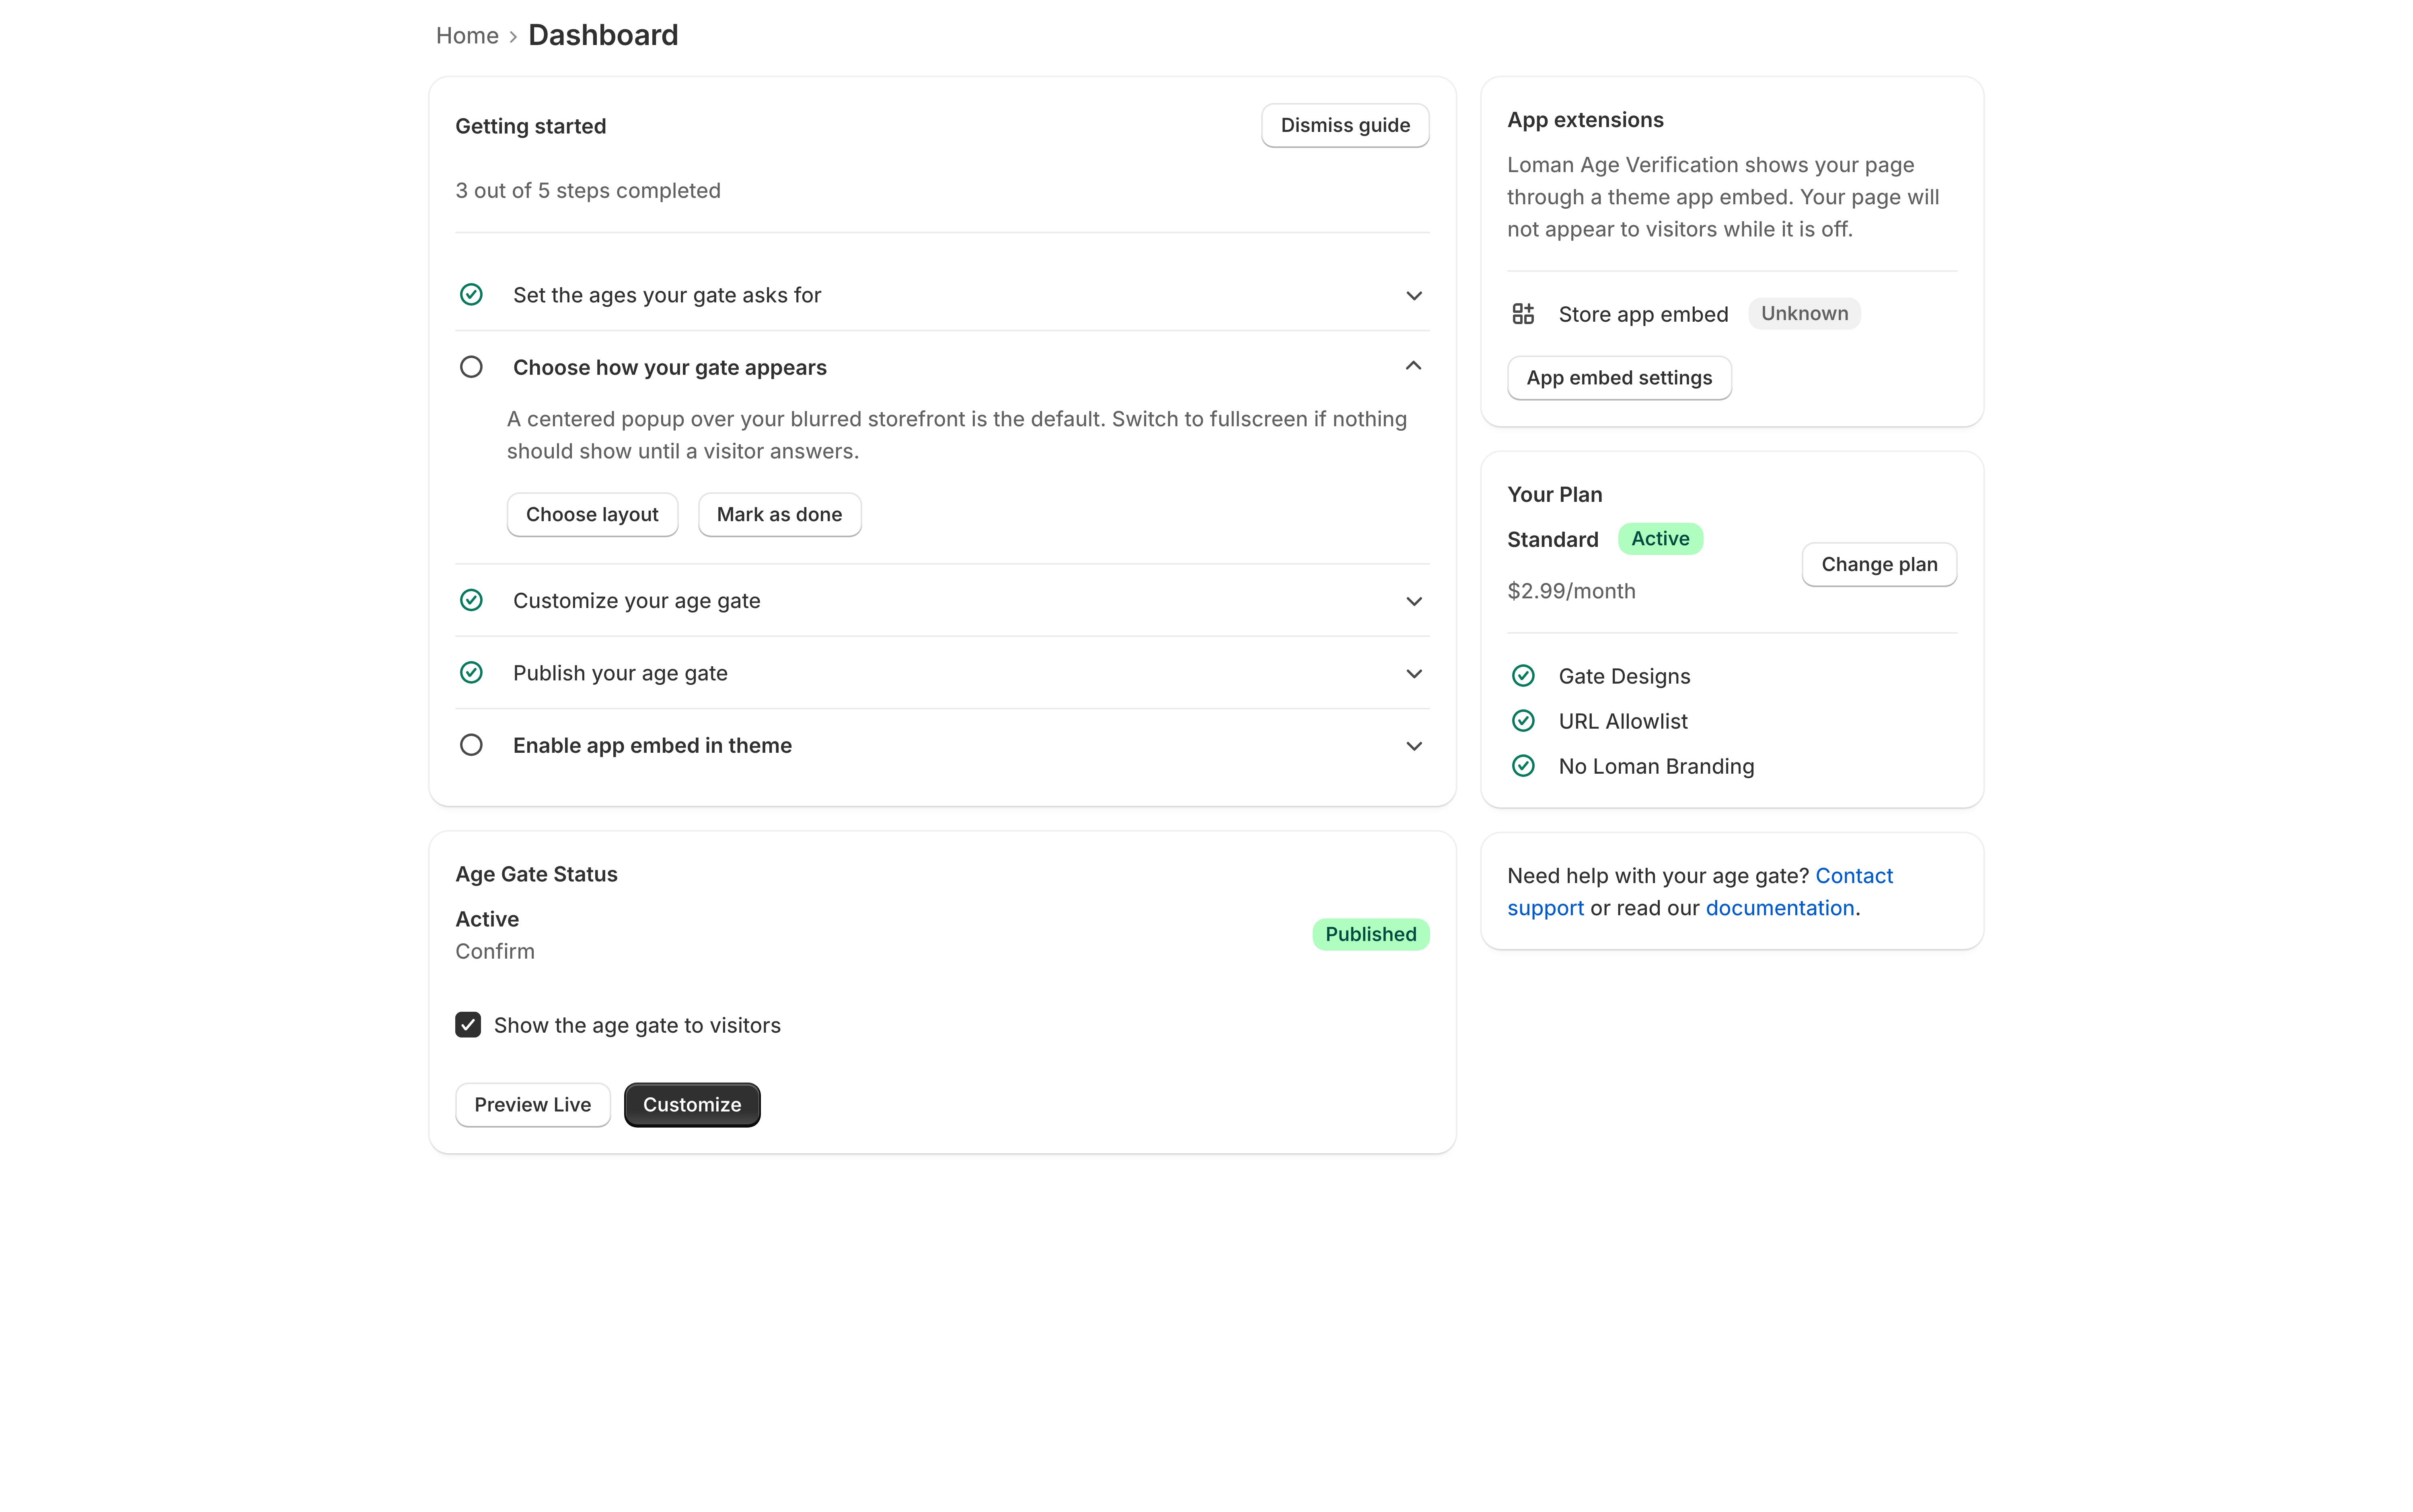
Finishing the checklist does not switch the gate on. There is a sixth step it does not list — the Show the age gate to visitors checkbox in the Age Gate Status card just below it. That separation is deliberate: you can set everything up, look at it, and decide when it goes live.
1. Set the ages your gate asks for
This one is first because an age gate is not configured until you have answered it, and the app cannot guess it for you.
Go to Settings → Age thresholds. There is one field and one list:
- Age to ask for when we can’t tell where someone is — the fallback. Most visitors never pick a market, so this is the number most of them will be asked. Your own country is usually the right answer.
- Add a rule — one per place where the age is different. Pick a country, optionally add a state or province code, and set the minimum age.
Full detail: Age rules by country and state.
2. Choose how your gate appears
Settings → How the gate appears has one dropdown, Gate layout, with two options:
- Centered popup — the gate is a card over your storefront, blurred behind it. This is the default and what most age gates look like.
- Fullscreen — the gate covers the whole page, and nothing of your store shows until a visitor answers.
Either way nothing underneath can be read or bought until they answer. See How the gate appears.
3. Customize a design
Go to the Templates tab. You are given both designs at install:
- Confirm — one button. “I am [age] or older”, with a decline button beside it.
- Birthdate — a date-of-birth field, checked against the age you set.
Click Customize on the one you want. The editor opens with a live preview beside the settings. See The gate editor.
The shipped wording — “Please confirm your age”, “You must be [age] or older to enter this store” — is a finished gate rather than placeholder copy, so publishing it untouched is a real choice rather than a missed step. Changing it to sound like your store is still worth five minutes.
Click Save when you are done.
4. Publish it
Saving stores your changes. Publishing is what selects that design as the one visitors see.
In the editor, or from the Templates list, click Publish. The Home tab then names it as your published template.
5. Turn on the theme app embed
This is the step that connects the app to your storefront, and it happens in Shopify’s theme editor rather than in the app.
From the Getting started checklist, open Enable app embed in theme and click Open theme editor. Toggle Loman Age Verification on, then click Save.
Full walkthrough, including how to get there without the checklist: Enabling the app embed.
6. Switch the gate on
On the Home tab, under Age Gate Status, tick Show the age gate to visitors.
That takes effect immediately — no save button, no delay. It is also what arms the checkout rule: enforcement follows this checkbox in both directions, so switching the gate off does not leave shoppers stuck at a checkout with no gate left to clear it. See Turning the gate on and off.
Check it worked
Open your storefront in a private or incognito window. Your gate should appear over the page, and nothing behind it should be readable or clickable until you answer.
If your storefront loads as normal, work through My age gate isn’t showing — the answer is nearly always an unsaved theme editor or Shopify’s own password setting.