Two templates have a countdown: Simple (as an optional section) and Countdown (where it is the centerpiece). Both use the same setting.
Set the deadline
- Open the template in the editor.
- Go to the Countdown category.
- Tick Show countdown timer (Check to enable the countdown timer on Simple).
- Set Launch date and time (on Simple, the date field just below the checkbox).
The field is a date and time picker. Pick the moment your store opens, or the moment a drop goes live.
Timezones
Type the time in your store’s timezone — the one set in your Shopify admin under Settings → General. That is what the app assumes you mean.
The app converts it to an absolute moment before the page renders, so a deadline of 9am in Denver counts down to 9am Denver time for a visitor in London, in Tokyo, and in Denver. Everyone’s timer hits zero together.
If your store’s timezone is wrong in Shopify, fix it there — the countdown follows it.
When the timer reaches zero
The timer gives way to a single word: LAUNCHED on the Countdown template, EXPIRED on Simple. Nothing else happens automatically: your page does not come down and your store does not open.
Launching is still the manual toggle on the Home tab. See Showing and hiding your page.
Styling it
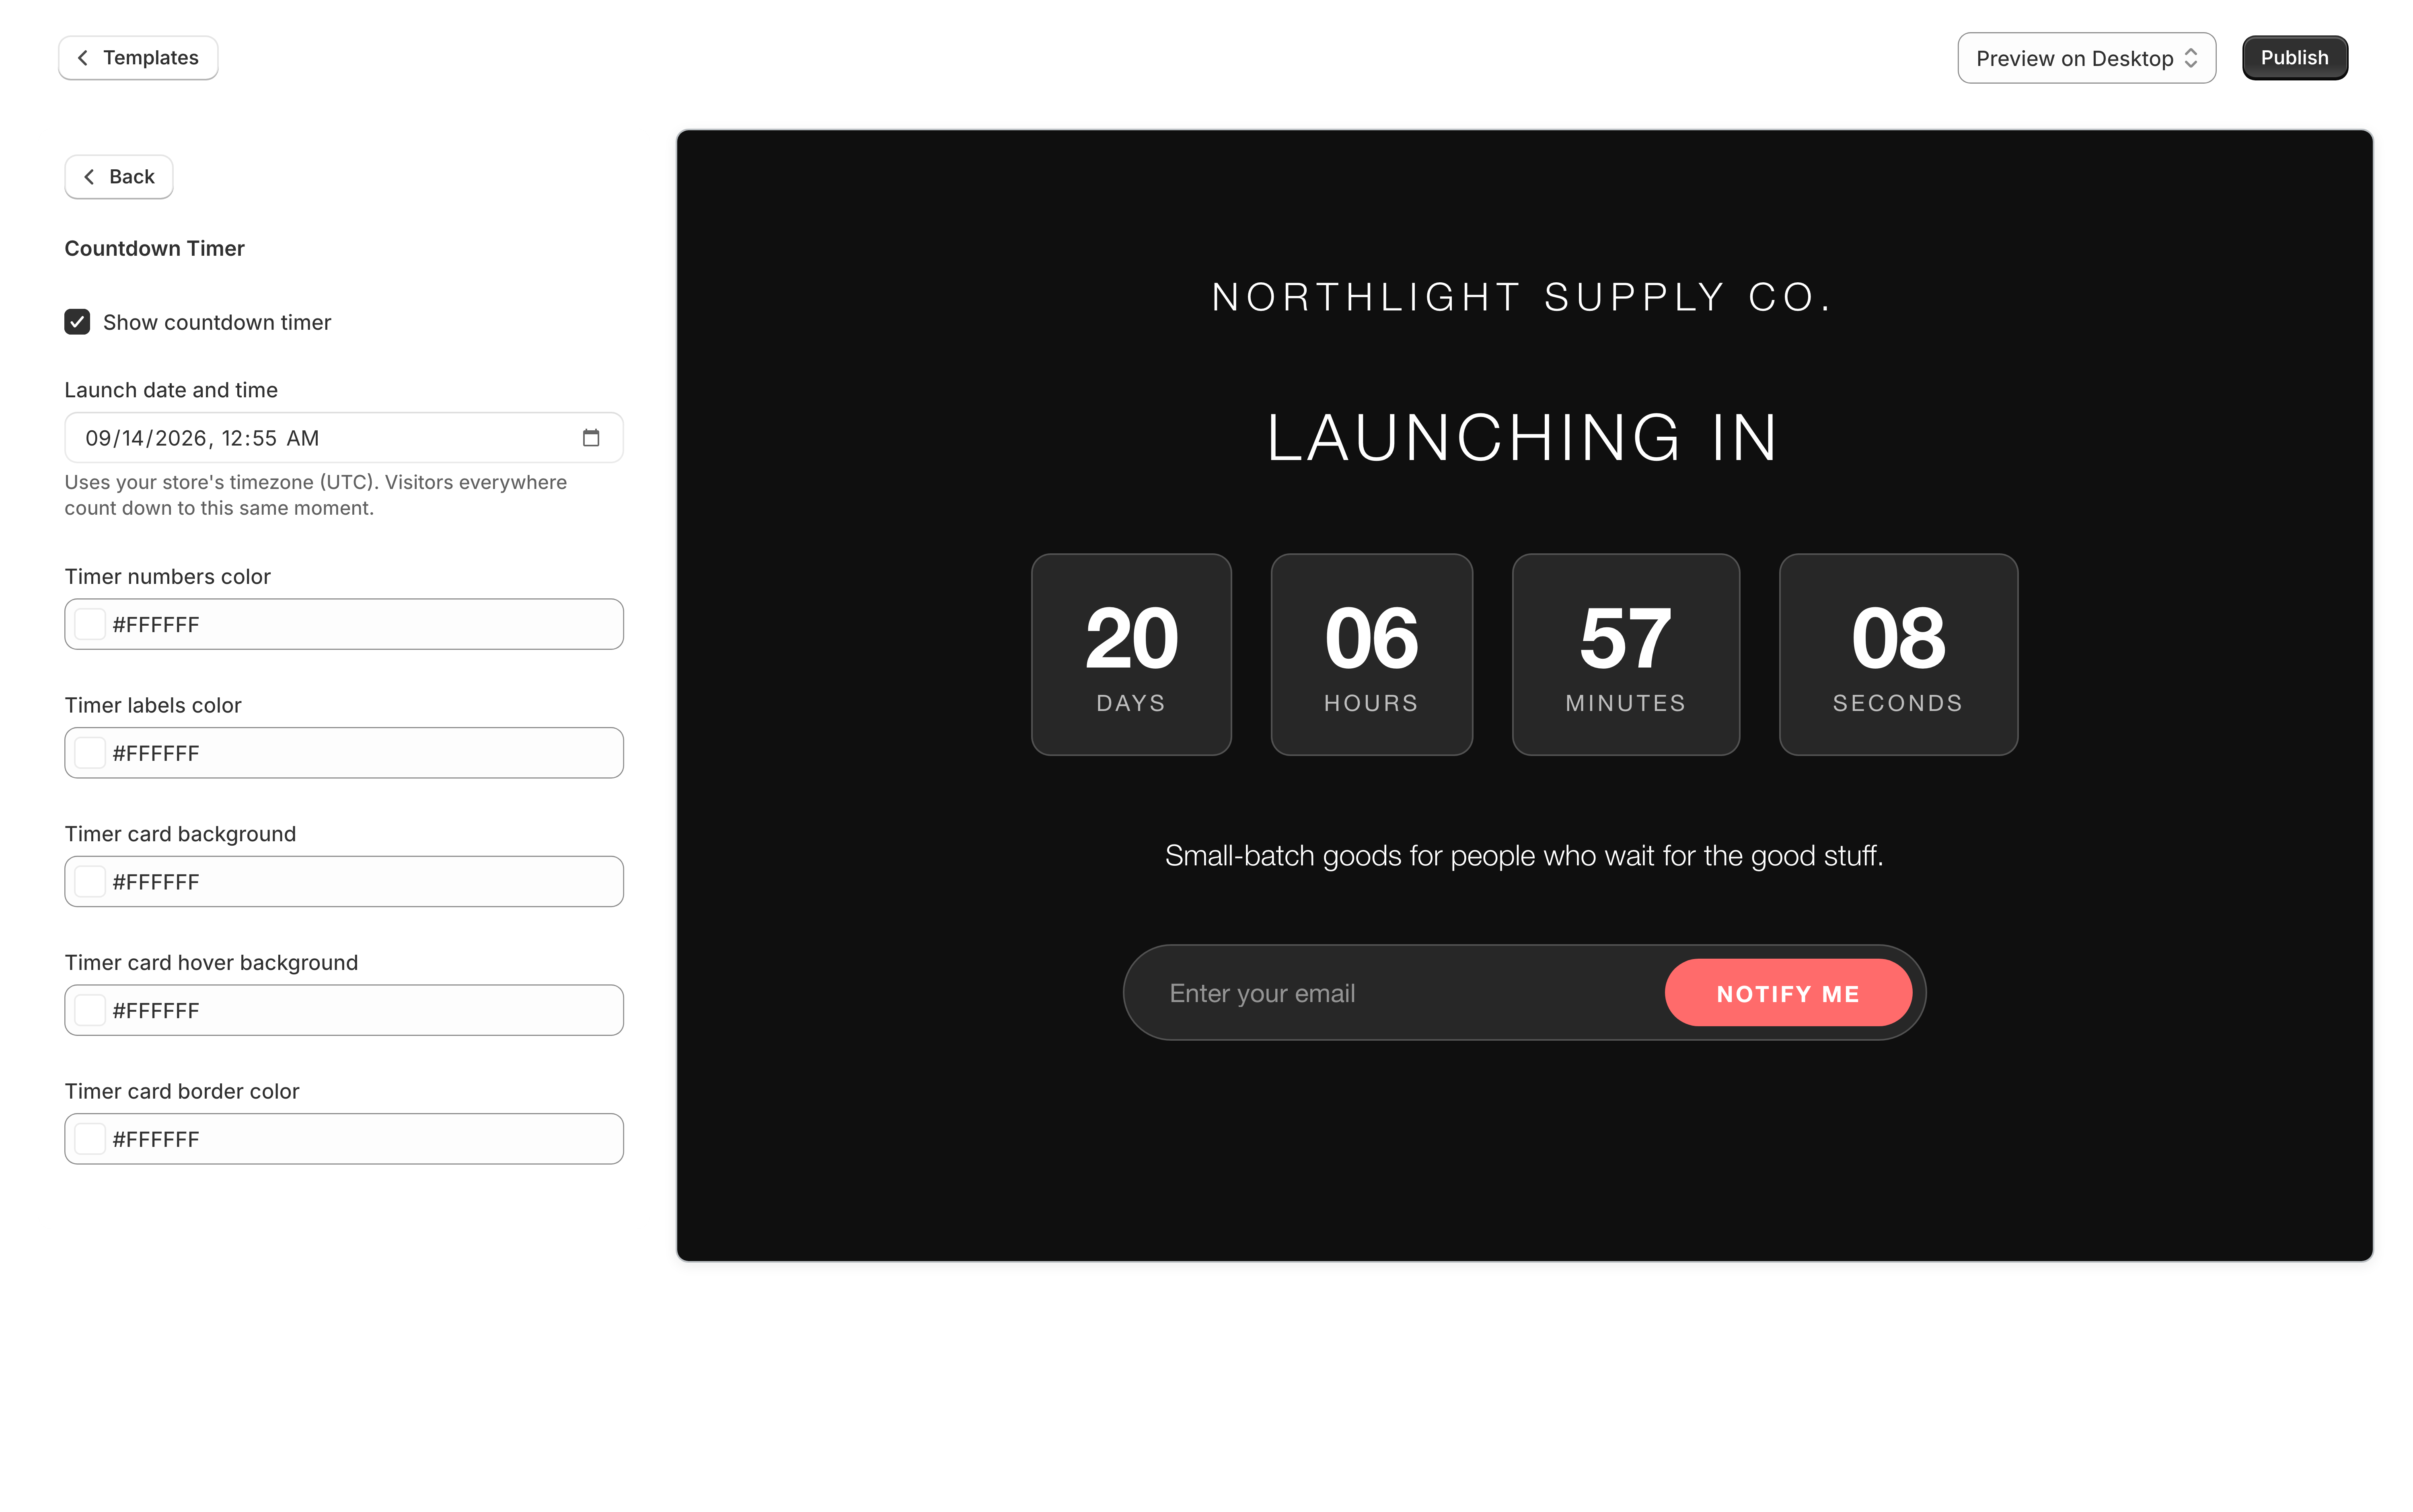
The Countdown template gives you full control of the timer’s appearance:
| Setting | Controls |
|---|---|
| Timer numbers color | The digits |
| Timer labels color | The words days, hours, minutes, seconds |
| Timer card background | The panel behind each unit |
| Timer card hover background | That panel on hover |
| Timer card border color | The panel’s outline |
On Simple, the timer inherits the page’s typography and font color instead — it has no separate color settings of its own.
Recurring drops
There is no repeat option. For a store that drops monthly, the workflow most merchants use is: set the next date, tick the visitor toggle a few days out, and untick it when the drop goes live. The template and its styling stay put between drops.